Monday, September 9, 2013

Crickety Blower

Over the past few weeks, my blower motor would sound like cricket whenever I accelerate, brake or go over a hump. Very noticeable in Fan speed of 1 and 2.

So, after much procrastination, I finally got down to checking the fan blower motor.

Accessing the blower motor is relatively easy. You'll have to remove the glove compartment first. The blower motor is situated towards the top part of the dashboard.


Un-clip the wire from the blower motor. Then get a good grip on the blower motor and turn it clockwise to unlock it from its position. Then pull it out. Please Note the position of the blower motor when you pull it out, because it has to go in the same way. Otherwise you'll find it a bit hard to place back the blower motor

Upon removing the blower motor, I found it filled with dust, just as I have suspected.


The design of the motor is such that it sucks in air. I guess this is to keep the blower motor cool? How ever this causes a lot of dust built up in the motor itself.
I took out my air-gun and cleaned the insided of the motor and also the blower. Could not believe the amount of dust. To clean the blades real good, I decided to jet it with water. Carefully covered the motor with plastic

Once everything was cleaned, fixing back was a breeze. The blower motor works fine now. No more noise and lots of money saved :-)

Monday, April 8, 2013

Door Projector Light

Just completed a small project over the weekend. I fixed a pair of door welcome lights for my little lion.


Wiring was pretty much simple and straight forward. There's no way to tap power for the lights from the door switch. This is because the Door lock, central locking, and door switch is combined into a single unit and is controlled by the BSI. I try to stay away from any wiring that's connected to the BSI a.k.a Bloody Stupid Interface, fearing that the BSI would get corrupted. Hence I resorted to tapping power from the cabin/courtesy lamp.


The light blue wire is +ve and yellow/green is -ve.


Ran the wire from the cabin light to down the left A - Pillar to under the glove box. Now that that the power source is settled, next was to wire up both doors.

Start with removing the door trims. There are 3 screw to remove, the rest are just clips.


Once you've removed the door trim, next is to carefully remove the white foam sheet

When you fix this back, make sure it is fixed properly, otherwise water from outside will seep thru the gaps into the car's cabin.

With the foam sheet removed, its time to wire the power cable in. If you have the energy and like things to look proper, you may push the wire thru the  rubber grommet. But this is very tedious and time consuming


I first used a thin flexible wire thru. Then tied the power cable and pulled the thin wire back out.


Once the power cable is thru, line it up securely so that it does not interfere with the power window mechanism.

An easier way to wire the power cable is just run it thru the door seal and into the door. Much more simpler this way.


For the right hand side, I just pulled the wire following the path of the wire loom.


Now with the wiring done, it was time to drill the door panel and fix the Led projector lamps.

Finally, just connect the projector lamp to the power cable, fix back everything and smile for a job well done.


You may purchase this Door Welcome Lights from my Online Store @ http://www.foreverdeals.asia/Online-Store.html?~~mode=product&~~id=17347608#!/~/product/id=17347608

Thursday, February 28, 2013

Exhaust Manifold Crack

After just over 2 years my exhaust manifold cracked again. That is twice in 5 years. I wonder what quality material was used for the Bestari's exhaust manifold.

Actually the reason I sent my car in was to replace the broken bolt which holds the manifold. While doing this, it was discovered that the manifold was cracked as well.


This time around, instead of changing it, I decided to weld it. Lets see how long it would last. Sorry, I don't have pictures of the repair to share. I had to leave the car at the workshop as I was busy with work, couldn't hang around while repair was being done.

Repair work took about 8 hrs. Had to leave the car at the workshop overnight. Collected the car today and it sounds fine. Repair work cost RM100 Only.


Breakdown  :- 

1. Manifold Welding - RM10
2. Labor to replace Idler Bearing - RM10
3. Removing Broken Manifold Bolt - RM50
4. Coolant - RM30 ( had to replace coolant because they removed the radiator to have more work space in the engine bay)

Hope this repair lasts. Otherwise have I'll have to hunt for an extractor :-)

Sunday, January 20, 2013

Peugeot 206 Dynamic Tensioner


After just over a year and  of replacing the dynamic tensioner a.k.a belt tensioner, my lion is whining once again. The last time it cost me about RM400 to get this replaced. Damn expensive part which does not last long. The other part which gives way often is the Idler roller. This cost RM150 to replace.

What gives way on this tensioner is the pulley(the plastic round thing with the bearing in the middle). Sadly spare part shops do not sell this pulley. The only sell the whole tensioner.

Undeterred, I started to search for the pulley, and after months of searching I finally found it!! :-).


This is an original part replacement. Fits the dynamic belt tensioner perfectly

I also managed to find the Idler Roller. 

Now you can get both of these at RM149 each on my online store at http://www.foreverdeals.asia/Online-Store.html


Friday, January 18, 2013

Peugeot 206 Power Steering Pressure Switch

Into my 5th year of owning this car, the  power stering pressure switch started to leak again. This would be my 3rd time changing it. The previous 2 times, this switch was replaced under warranty.

This is the place where it leaks


At first I thought it was leaking at the oil seal, but after taking out the switch, I was able to see that oil was leaking thru the switch. This problem seems to be a very comment problem with almost all Peugeot/Citroen models


Alas...nothing can be done except to replace the switch.


This is the switch I bought. Part No : 401509 / 9677899580 You may purchase it here, It is shipped worldwide.

Tuesday, January 15, 2013

Engine Oil and Filter, Routine Maintenance

Over the years, I've been asked many times about oil changes..how often to do it? what type of engine oil to use? What should I do to keep my car in excellent condition.

 Here I Share what I've been doing the past 5 years, and has so far clocked 170,000+kms.


 Oil Changes are done every 10,000kms using Semi Synthetic Oil. I don't see the point of using Fully Synthetic Oil for a 1.4 8V engine. Mineral Oil would also be good enough. I usually use either TOTAL Quartz 7000 10W-40 or Petronas Syntium 800 10W-40. Lately I've been using Petronas as its much easier to get.


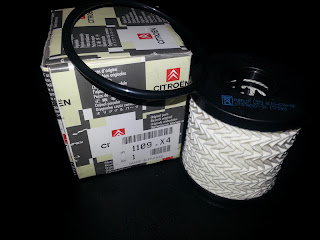
Always use genuine oil filter. Never compromise on that. Back in 2009 the oil filter used to cost almost RM50. Now you can get it as low as RM20 from my online store  here
http://www.foreverdeals.asia/Online-Store.html

Once a year, regardless of mileage, change the air filter. I also open up and clean the rear drum brakes. Tighten undercarriage. 

Every two years or 40,000kms, I change my brake fuild, power steering fuid and engine coolant.

For the Gearbox, I change the AL4 gearbox oil every 40,000kms or once a year.

Check all rubber bushes and mountings every 20,000kms.

Change timing belt every 80,000kms.

The rest just change parts when they are worn out.