Sunday, December 23, 2012

Peugeot 206 Rear Wheel Bearing

After 150,000kms, my rear wheel bearing gave way. Getting quotations from  workshops and spareparts shops, it seemed like like it was going to be a expensive affire. Each bearing would costs RM160 and labor RM60 perside, which means to replace both rear wheel bearings would cost about RM440. This I felt was too expensive.

So as usual I began my bargain hunting. And finally I managed to get both Bearing changed for only RM220.00

I got my bearings from SKF. Each costs only RM80. Part No. VKBA3525. But the clip that came with this bearing could not be used. So I had to use back the old bearing clip.


To get my bearing fixed, I went to the workshop near my house. Its run by 2 brothers. Very nice chaps. They're not so experienced with french cars but are more than willing to learn and try. They've worked on my car a couple of times before and I'm very happy with their work.


I always enjoy coming here as they are friendly and nice. Always willing to listen to my suggestion on how to replace a part or repair it. They even send me back and come fetch me when the car is ready. Wished more workshops will provide this kind of service.


I replaced my wheel bearing a bit too late. This caused the left rear bearing to be jammed and it was impposible to remove the brake drum. Thank goodness they had a special tool which could solve this.


This red handle is like a dumbell. what is done is this weight is pulled along the shaft and the momentum pulls out the drum.


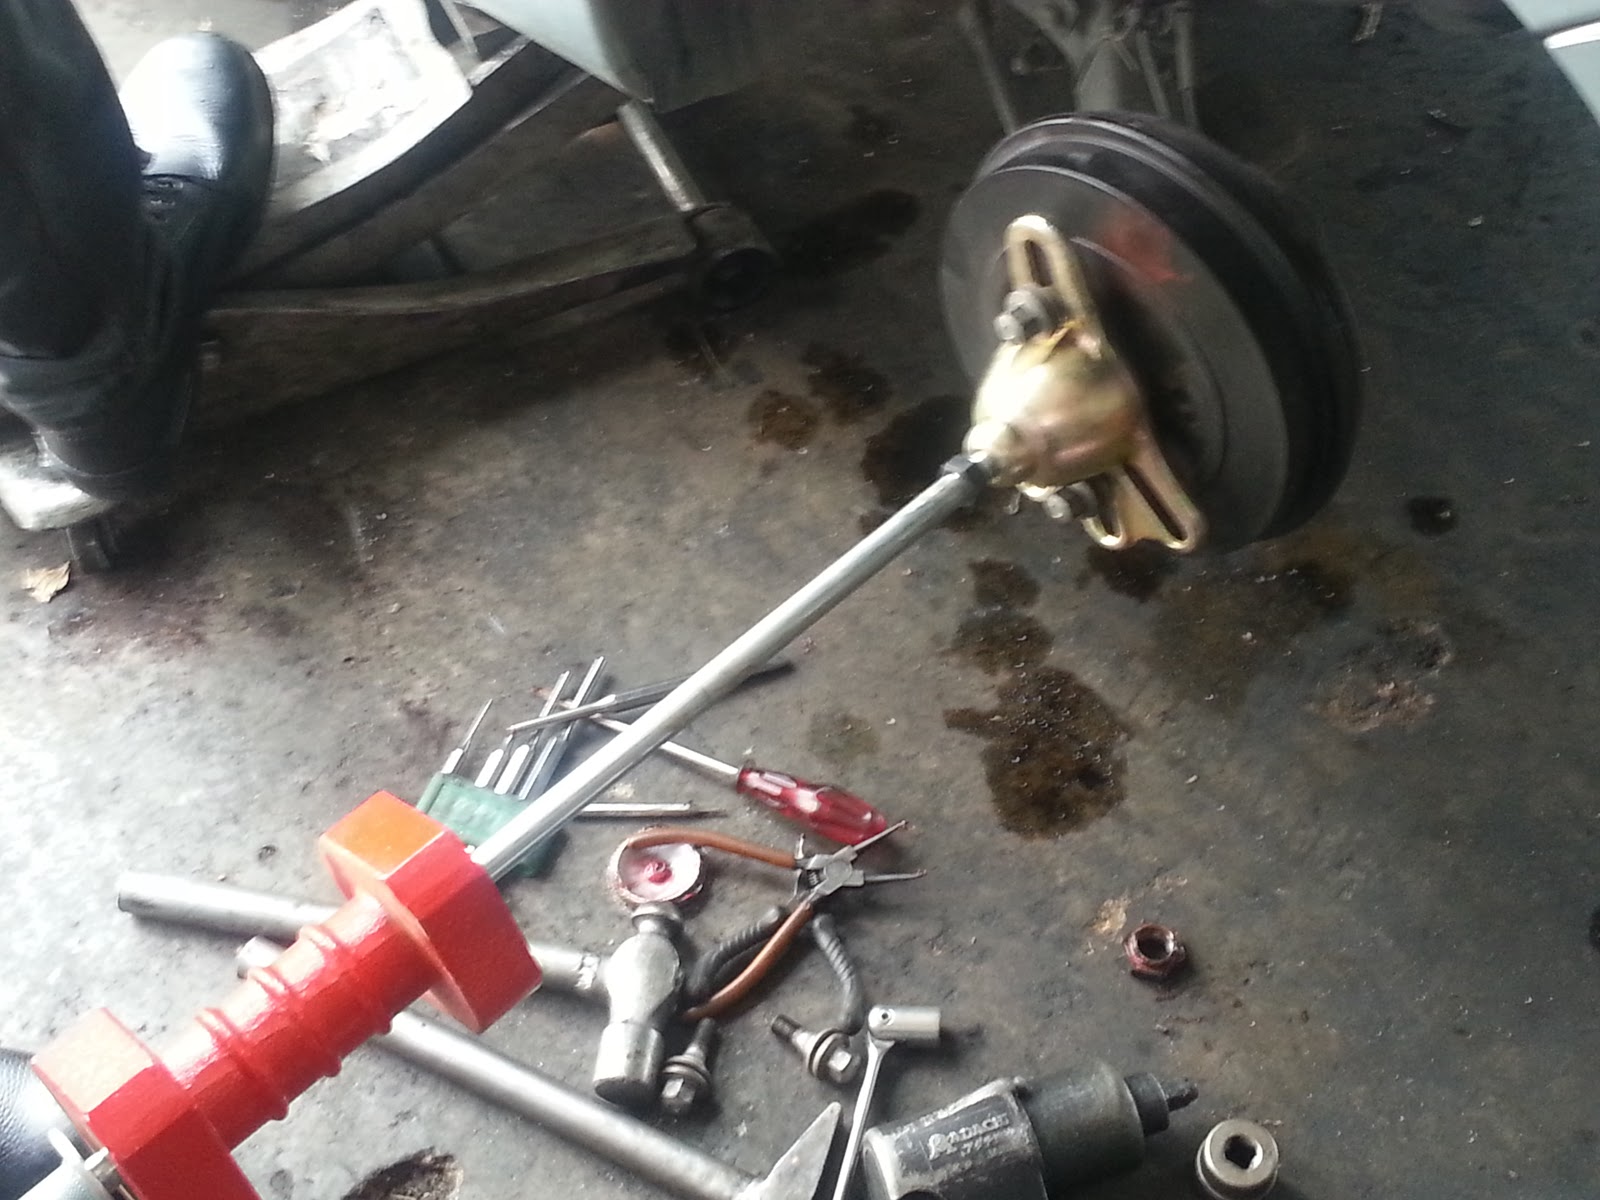
After the drum was out, replacing the bearings were a breeze as they had the brearing pressing tool. All this was done within and hour and without me burning a hole in my pocket :-)

Friday, October 19, 2012

Improving Acceleration

The 8v, 1.4 engine coupled with the AL4 gearbox on the 206 makes it grossly underpowered. Nipping in and out of city traffic is almost impossible in this car. This car's pick up from standstill feels like forcing an Elephant to do a 100M sprint.

There are the commong things you can do to improve acceleration slightly, like changing the air filter, exhaust system, etc. But all this costs money. Today I'll share with you something simple to improve the car's acceleration. Best of all its free. The idea is to get the throttle body butterfly valve opened as much as possible when the accelerator is floored.

First step is to minimise any slack @ throttle cable. This is done by pulling out the retaining clip, then pulling the cable to the left as much as possible, then place the retaining clip back.


If you look at how the throttle body(TB) operates, you can see it how it stops when the accelerator pedal is floored. So the next step is to file down the stopper on the TB.


It would be good if you have an OBD2 reader attaced to the car. This is so that you can monitor the increase in the throttle position as you work on the car. Take your time and file it.


My initial Absolute Throttle Position was only 70.2%. Now it has increased to 78%. If you're wondering, I'm using this ELM327 device to connect to the car. You can buy it over the internet for less than RM100.

Now the car accelerates much better(of course with the accelerator floored) and improved top speed to, and most definately increased fuel consumption.

Friday, October 12, 2012

Leaking Heater Matrix (Specifically for Right Hand Drive Model)

Front left floor mat was drenched with coolant. A sure sign that the heater matrix is leaking.


Since I was a bit short on time to go get it fixed, I decided to do a temporary fix by bypassing the heater matrix. I had some extra pvc pipes and decide to use them. Made a U-Shaped bypass for the heater matrix.


The problem with this's car airconditioning system is that it uses the heater matrix to regulate cabin temperature. It does not have a thermostat. So, for the next few weeks untill I had time to repair the heater matrix, I was experiencing Eskimo World every time I drove. Had to manually on and off the air-cond.

I went to a couple of workshops and they told me that the dashboard needs to be removed in order to repair the heater matrix. Luckily for my good friend Michelin V-k Badman's quick guide, I was able to repair the heater matrix without having to remove the dashboard.

Start by removing the glovebox and loosening up the center console.


Once the glove compartment is removed, you'll have full access to the heater matrix.


Next, is to loosen up the heater matrix. There are 2 screws and 1 nut which needs to be undone


Once this is done, then gentle remove the long part of the heater matrix. Once this is taken out then gently pull out the heater matrix from the blower. The heater matrix is held in place by 2 clips. Undo these clips and pull it out slowly.


You might have to pull a  bit on that part of the dashboard for the heater matrix to slide out. Once it out, I tested for leaks by using high preassure water.


The leak was caused by these 2 o-rings. I was a bit lazy to go out and get original replacement o-rings. Dug my tool box for it and managed to get similar sized o rings. These are common o - rings which can be bought anywhere. They are slightly different than the original ones but can be used.


Once the o-rings were replaced, checked for leaks, and then proceeded to fix back everyhing. Quite an easy DIY. Took less than 2 hours to complete this job.

Sunday, August 5, 2012

Cooling Down

Just changed my coolant. Average running temperature has drop by about 10° Celsius. 
Before the change, running temp was between 80 - 90° Celsius.

After the change, temp is now between 70 - 80° Celsius. Only passes 80° Celsius. on extremely hot days
I do my coolant change every 2 years, and  I use this coolant for all my cars.
This costs RM18 per bottle/liter. The recommended mixture is 50% coolant and 50% water. The 206 needs 7 litres of  fluids. I use 3 litres of coolant and the rest with filtered, de-chlorinated water.

Peugeot/Citroen requires the use of a header tank when filling up the radiator. This is to ensure the radiator/cooling system is bled of air properly. The same results can be achieved by using any plastic bottle. Just ensure the mouth of the bottle fits the expansion tank.

 I searched my house and managed to find this bottle which is a perfect fit.


Cut out the bottom of the bottle in order to pour in the coolant.


You can either use a plastic bag or PTFE tape around the mouth of the expansion tank to make a perfect seal.

Drain out the old coolant by disconnecting the bottom radiator hose. Dun forget to open up both bleed screws. 
One bleed screw is on the pipe heading into the heater matrix
The other is on the Thermostat housing
Next is to flush the engine and radiator. This step is optional, depending on the condition of your coolant/cooling system. Flush, just insert a garden hose into the top and then bottom of the radiator and bottom hose and let the water run until clean water comes out from the radiator/radiator hoses. Next fill up the expansion tank with coolant. Close the bleed screws one by one once coolant comes out without any bubbles. First the thermostat housing bleed screw followed by the heater matrix.

Fill up the header tank with water and switch on the engine. Keep the engine running until no more bubbles appear.


Once no more bubbles, the process is finished. Remove the header tank, and check the coolant level. If there is too much coolant in the expansion tank, siphon it out. 

Friday, May 18, 2012

Broken Bones


Such a sad day for my baby lion today. She was enjoying her daily sprint on the SILK Highway, happily negotiating a corner. Unfortunately there was a dog standing right in the middle of the right lane today. Could not avoid it. It was a direct hit, Dog vs Lion. Dog no where to be found,Lion badly injured :-(


Called the highway authority, and they were there within 20 minutes. What was better, I called Peugeot Careline for a tow truck, and the tow  truck arrived within 10 minutes.


Called my buddy Ridt for help. Thanks bro for sending me home.


Damaged was quite bad. The radiator broke, the right fender was also dented. I wonder if the dog had bones of steel. There was no blood, no fur, nor any indication of the car hitting a dog. Upon impact, the seat belt pre tensioner was activated and the engine cut off. Luckily managed to coast the injured lion to the road shoulder.


Towed the car the the Peugeot Balakong Service Center, located at No. 34, Jalan CJ 1/7, Kawasan Perindustrian Cheras Jaya, 43200 Balakong, Selangor. Phone No : 03-90740213. They provide collision repair and insurance claims. I guess this is the best hospital to send the Lion to. It will take about a month for the Lion to recover. Gonna miss her very much. But I have a reason to smile. I can now use my little red rocket daily.


Thursday, May 10, 2012

Oil + Heat + Rubber = Disaster

Was feeling a bit bored, so I decided to go lie down under my car. Jacked up the car on stands, brought out my papan tidur and assumed my most relaxing positing under my lion.

Was looking here and looking there, checking the condition of mountings and rubber boots, then something dahsyat caught my eye.

The bottom radiator hose was drenched with engine oil. I guess every time the oil filter is changed, engine oil is inevitably spilled unto this water hose.


Oil on rubber with heat is a very bad combination. Sooner or later the hose will break. So please check the condition of your bottom radiator hose. Get it washed as soon as possible or get it replaced is the hose is already damaged. Imagine the hose breaking and your engine overheating suddenly. Worst case scenario a burnt head gasket --> overhaul time.

Peugeot Planet/ LEXIA/ DIAGBOX Diagnostic Services

I  got myself a PP2000/Diagbox diagnostic tool after getting fed up  with local workshops which charge anywhere between RM40 - RM80 per diagnose.

If you need your car to be diagnosed( free of charge ), email me your contact at aldridge1@gmail.com and I'll get back to you. With this PP2000, I'm not able to update your ECU nor re-tune your ECU ;-). Its plainly for diagnostic & testing purposes.


1. Basic Scanning and Fault clearing
 
What you'll get is a diagnose and clearing of any fault. I will also explain the meaning of the fault codes, possible causes and remedies. If you're really interested, I'll also explain how PP2000 works.


2. Scanning, Fault Clearing and Actuator Tests 

In addition to the above, every ecu/sensor/actuators/ will be tested and parameters measured and compared with normal/standard measurement. Example here is tests done on my 206. This test varies slightly depending on your Peugeot model and will take anywhere between 30minutes to 60 minutes. Basically I will test everything which is allowed by the Peugeot Planet software.

 I'm using the current version of PP2000. Version 11A(25.01)


Sample of Scanning Screen.


Faults present @ Engine ECU


Fault Reading and Clearing

I'll explain the meaning of the fault code


Clearing of Fault Codes


Parameter Measurements & Actuator Tests

On my 206, here is a sample of what can be tested and measured. Other Peugeot models will vary.


 Measuring Fuel Injectors Parameters
 Making sure that all parameters are within range.
 Actuator Test
Actuator test will be carried out on each testable component


Actuator Tests to be carried out on G/B

Fitting of Accessories

Fitted any new accessories? or changed tyre size?
Update your BSI to get accurate meter readings.


Hope to hear from you soon. A healthy Lion is a Happy Lion :-)